The Masterclass Blueprint: How to Completely Uninstall Applications on Your Windows PC and Laptop (Down to the Core Root)
2 weeks ago
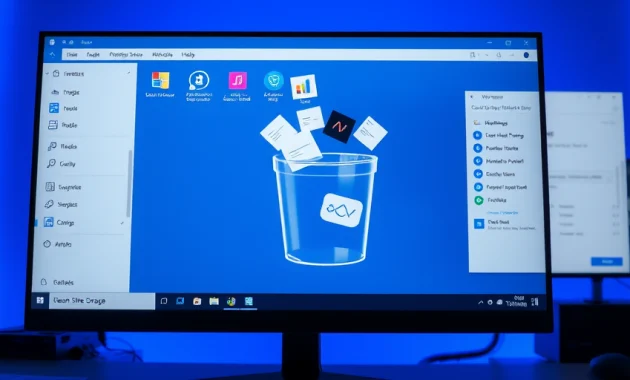
We have all been there. You click on your file explorer, check your local disk storage bar, and watch it glow a menacing, anxious red. Your system, once a blazing-fast machine that booted up in a matter of seconds, now chugs along like an ancient steam engine. It stutters when opening basic web browsers, lags during competitive gaming sessions, and occasionally freezes entirely when you try to multitask.
To get work done or unwind on a PC, we download a massive suite of tools: Microsoft Office, Adobe Creative Cloud, heavy web browsers like Google Chrome, specialized media players, download managers like IDM, and giant, triple-A gaming titles.
But software landscapes change. You finish a creative project and no longer need that heavy video editing suite. You stop playing an online game that takes up 100 gigabytes of space. Or perhaps you installed a program that turned out to be buggy, unstable, or packed with intrusive bloatware. Naturally, you decide to delete it.
Here lies the silent trap of the Windows operating system: clicking "Delete" or using the basic, surface-level uninstaller rarely actually deletes the application.
When you install a program, it doesn’t just sit neatly in a single folder under Program Files. It weaves itself deeply into the complex fabric of your operating system. It creates hidden configurations in your user profile, drops temp files in hidden system caches, schedules background updates, and scatters hundreds of intricate strings inside the Windows Registry database. When you use a standard uninstaller, the surface app disappears, but the roots remain behind. Over time, these left-behind digital ghosts pile up, fragmenting your system and slowly killing your computer’s performance.
If you are ready to reclaim your digital real estate, optimize your machine’s efficiency, and learn how to wipe software out of existence permanently, this ultimate guide is for you. We will break down four primary methods to remove software—ranging from instant native shortcuts to deep-cleaning absolute overrides—written in a straightforward, human-to-human style designed for real-world application.
Anatomy of a Software Installation: Why the Roots Matter
Before diving into the operational walk-throughs, we must pull back the curtain on how Windows actually manages software. Understanding where apps hide their files will demystify why third-party overrides or manual file cleanups are necessary.
When an installer package executes on a Windows device, it typically distributes data across five distinct architectural zones:
Installation Data Map:
├── 1. Binaries Directory  ➔ Program Files or Program Files (x86) (.exe files)
├── 2. User Configurations ➔ Hidden AppData folder (Local, LocalLow, Roaming)
├── 3. Public Cache Data   ➔ ProgramData folder (shared machine parameters)
├── 4. System Registry     ➔ Windows Regedit hive (system integration paths)
└── 5. Background Services ➔ Task Scheduler & local background telemetry daemons
When you use a standard, surface-level uninstaller, Windows typically only clears the primary Binaries Directory. The remaining four zones—AppData configurations, shared machine parameters, Registry hives, and background telemetry daemons—are frequently neglected.
If you uninstall dozens of apps over the course of a laptop's lifespan, these digital fragments turn into hundreds of megabytes of corrupt configuration files and thousands of broken registry keys that the operating system must parse every time it boots up. This is the root cause of systemic OS degradation.
The 4 Methods to Uninstall Windows Applications
Different types of applications require different levels of tactical removal. We have broken down the four core strategies to clean up your PC, moving from the fastest surface methods to the most intensive deep-cleaning options.
1. The Rapid Route: The Windows Start Menu
The revamped Windows Start Menu is the fastest way to drop simple applications, casual utility software, or modern applications downloaded natively from the Microsoft Store (Universal Windows Platform or UWP apps).
Step-by-Step Execution:
-
Open the Start Menu by clicking the Windows logo icon at the bottom left of your taskbar, or simply press the Windows key on your physical keyboard.
-
Scroll through the alphabetical catalog of installed applications to locate the targeted software you want to purge.
-
Right-click directly on the application's icon or name.
-
A contextual drop-down menu will appear. Click the Uninstall button (often marked by a trash can icon or simple text).
-
If the app is a modern Microsoft Store application, Windows will instantly delete it right there. If it is a traditional desktop application, Windows will automatically open the Control Panel or Settings app to let you finalize the removal process.
2. The Traditional Anchor: The Classic Control Panel
For traditional desktop software—massive installation packages like old Adobe programs, specialized corporate tools, or legacy applications—the classic Control Panel remains a reliable utility. It accesses the system's core uninstallation engine to cleanly invoke the application's built-in removal tool.
Step-by-Step Execution:
-
Trigger the Windows Run box by pressing the Windows Key + R shortcut on your keyboard.
-
In the text field, type control panel and press Enter or click OK. (Alternatively, type "Control Panel" into your Windows Search bar and click the application).
-
Look at the upper right of the Control Panel window and set the View by option to Category.
-
Locate the section labeled Programs and click the green link directly underneath it titled Uninstall a program.
-
You will be greeted by a comprehensive table showing your software inventory, complete with installation dates, file sizes, and version numbers. Scroll down or use the top search bar to highlight the target program.
-
Right-click the program name and select Uninstall, or click the Uninstall/Change button that populates along the top header bar.
-
Follow the program's specific wizard prompts to remove the software, allowing the process to fully complete before closing out the window.
3. The Modern Dashboard: Windows Apps & Features Settings
If you are running Windows 10 or Windows 11, Microsoft has centralized system administration into a sleek, modern Settings panel. This menu combines the strengths of the Start Menu and Control Panel, allowing you to manage both modern mobile-style store apps and legacy desktop programs in a single location.
Step-by-Step Execution:
-
Instantly open the Windows Settings app by pressing the Windows Key + I shortcut on your keyboard.
-
From the main dashboard grid, click on the Apps category.
-
On the next screen, select Apps & features from the left-hand sidebar (on Windows 11, this option is simply labeled Installed apps).
-
Use the built-in search field to filter by app name, or sort the entire list by Size or Installation Date to identify hidden storage hogs.
-
Click on the application entry to expand its options. On Windows 11, click the three horizontal dots located on the far right of the app entry.
-
Click the Uninstall button. A secondary confirmation prompt will drop down; click Uninstall once more to launch the removal process.
4. The Absolute Purge: Revo Uninstaller (Deep Root Eraser)
If you rely solely on the three native Windows methods described above, your computer will still gather hidden file residue over time. When applications get corrupted or refuse to delete normally, you need a dedicated tool to step in.
Third-party utilities like Revo Uninstaller (which offers a highly capable, fully functional free version) bypass the limitations of traditional uninstallers. Revo runs the application's native removal tool first, then goes deep into your system to scan for and eliminate any lingering registry paths or leftover files.
Step-by-Step Execution:
Revo Uninstaller Operation Stream:
Launch Utility ➔ Select Software ➔ Run Standard Uninstaller ➔ Deep Scanning Mode ➔ Wipe Registry Residue ➔ Clear Disk Cache
-
Acquisition and Installation: Download the official freeware installer directly from the Revo Uninstaller website. Run the setup file and launch the application.
-
Software Selection: Upon launching, Revo automatically compiles an inventory grid of every piece of software on your machine. Choose your target application using one of three methods:
-
Highlight the item and click the Uninstall icon on the top toolbar.
-
Right-click the application name and select Uninstall from the contextual menu.
-
Simply double-click the application card directly.
-
-
The Preliminary Backup: Revo will initialize, creating a System Restore Point and backing up your Windows Registry. This acts as a crucial safety net in case you accidentally remove a shared system file.
-
The Standard Run: Revo will prompt the application's built-in uninstaller to run. Complete that standard uninstallation process just as you normally would.
-
Deep Scanning Mode: Once the standard uninstaller closes, return to the Revo interface window. You will see three choices under Scanning modes: Safe, Moderate, and Advanced. Select Advanced to authorize Revo to check deep inside your system directories, then click the Scan button.
-
Registry Purging: Revo will analyze your system and display a nested tree diagram of all left-behind Registry paths.
⚠️ Pro-Tip: Carefully review the bolded lines. Only check the boxes for files directly linked to the application you are deleting. Click Select All (if you are certain they are all related entries), click Delete, and then confirm by clicking Yes.
-
Junk File Eradication: On the final screen, Revo will show a list of leftover directories, user profiles, log files, and cache fragments taking up space on your hard drive. Click Select All, hit Delete, and click Finish. The application is now completely eradicated down to the absolute core root.
Tactical Strategy Matrix: Choosing Your Weapon
To help you decide which method is best for your current situation, consult this operational breakdown:
| Method Option | Deep Cleaning Power | Ideal Target Use Case | Time Cost | Risk Index |
| Start Menu Quick-Drop | Minimal (Leaves configurations) | Casual Microsoft Store apps, lightweight tools, and games. | < 10 Seconds | Ultra-Low |
| Control Panel Interface | Moderate (Standard cleaning) | Traditional standalone work tools and legacy software. | 1 Minute | Low |
| Apps & Features Settings | Moderate (Standard cleaning) | General system maintenance and sorting files by size. | 1 Minute | Low |
| Revo Uninstaller Suite | Absolute (Total System Purge) | Intrusive suites (antivirus tools), large games, or corrupted software. | 3-5 Minutes | Moderate (Requires reading keys) |
Taking Back Full Digital Sovereignty
By keeping your storage clean and knowing when to use standard tools versus a deep-cleaning override, you protect your PC from systemic performance drops. Don't let old software drag down your machine's speed. Take a few minutes to clean out your system, wipe away left-behind file residue, and enjoy a faster, more responsive computer.
Frequently Asked Questions (FAQ)
1. What is the best way to uninstall a program in Windows?
The best method depends on the software. Small applications can usually be removed through the Start Menu or the Apps & Features section in Windows Settings. Larger desktop programs are best removed using the Control Panel, while stubborn or corrupted applications may require a dedicated uninstall utility that removes leftover files and registry entries.
2. Does uninstalling a program completely remove it from my computer?
Not always. Many applications leave behind configuration files, temporary folders, registry entries, cache files, and user settings after being uninstalled. These leftover files usually do not cause immediate problems, but they can accumulate over time and consume storage space.
3. What are leftover files after uninstalling software?
Leftover files are data that remain on your computer after an application has been removed. These may include:
- Cache files
- Log files
- Configuration files
- User preferences
- Temporary files
- Registry entries
- Empty installation folders
Cleaning these files can help keep your system organized.
4. Is it safe to delete leftover registry entries?
Only if you know exactly what they belong to. Incorrectly deleting registry keys can cause software or Windows itself to malfunction. Beginners should avoid manually editing the Windows Registry unless they have a backup or are using a trusted uninstall tool.
5. What is the difference between Control Panel and Apps & Features?
Both tools uninstall applications, but they serve slightly different purposes.
Control Panel
- Traditional desktop programs
- Legacy software
- Older Windows applications
Apps & Features (Installed Apps)
- Microsoft Store apps
- Desktop programs
- Easier search and sorting
- Modern Windows interface
6. Why won't some programs uninstall?
Applications may fail to uninstall because of:
- Corrupted installation files
- Missing uninstall components
- Running background processes
- Damaged Windows Installer services
- Permission issues
- Malware infections
Restarting Windows or using a specialized uninstall utility often resolves the issue.
7. Can I simply delete the Program Files folder to uninstall software?
No.
Deleting an application's folder removes only its executable files while leaving behind registry entries, shortcuts, services, scheduled tasks, and configuration files. Always use the official uninstall method whenever possible.
8. Will uninstalling software improve my computer's performance?
It can, especially if the application:
- Runs automatically during startup
- Consumes background memory
- Uses CPU resources
- Installs background services
- Occupies a large amount of storage
Removing unnecessary software helps free disk space and may improve boot times.
9. What is the safest way to uninstall applications?
The safest order is:
- Windows Start Menu
- Apps & Features (Settings)
- Control Panel
- Trusted third-party uninstall software (for stubborn applications)
Always create a restore point before making significant system changes.
10. How do I remove applications that refuse to uninstall?
You can try the following:
- Restart your computer.
- Run the uninstall process as Administrator.
- Boot Windows into Safe Mode.
- Use Microsoft's Program Install and Uninstall troubleshooter.
- Use a reputable uninstall utility that removes damaged installations.
11. Should I restart my PC after uninstalling software?
Yes. Restarting ensures that:
- Locked files are removed.
- Background services stop completely.
- Registry changes are applied.
- Temporary files are cleared.
Many uninstallers specifically recommend restarting the computer.
12. How often should I remove unused programs?
Review your installed software every three to six months. Removing applications you no longer use helps maintain available storage, reduces startup programs, and keeps your system cleaner.
13. Does uninstalling antivirus software require special steps?
Yes. Many antivirus programs install deep system drivers and security services that remain active after a normal uninstall. Most antivirus vendors provide dedicated removal tools to completely remove all components.
14. Can uninstalling software delete my personal files?
Generally, no. However, some applications ask whether you want to remove personal settings, saved data, or user profiles during the uninstall process. Always read the prompts carefully before confirming.
15. What should I do before uninstalling a program?
Before removing software:
- Save important files.
- Export application settings if necessary.
- Close all running programs.
- Create a Windows Restore Point.
- Verify that you no longer need the application or its data.
These precautions help prevent accidental data loss.