The Comprehensive Guide to Local Web Development Architecture: Setting Up, Optimizing, and Securing XAMPP, IIS, and WAMP on Windows Systems
1 week ago
The modern web ecosystem is a complex web of interconnected technologies, microservices, frameworks, and database architectures. In the early days of the web, developing a site was as simple as writing plain HTML in a text editor and uploading it directly to a production server via FTP. Today, that approach is a recipe for disaster. A single broken line of code, an unescaped SQL query, or a version mismatch in your PHP runtime can instantly crash a live commercial website, leading to downtime, lost revenue, and security vulnerabilities.
To prevent these production failures, modern software engineering relies on the paradigm of local development. By turning a standard Microsoft Windows workstation into an isolated, offline web server environment, developers create a safe testing ground.
In this local laboratory, you can build applications, refactor complex code, run database migrations, and fix bugs under realistic server conditions—all without an active internet connection, cloud hosting fees, or risk to your live production site.
This technical guide covers the inner workings of local web server architectures. We will look closely at the networking pathways that make offline development possible and provide comprehensive blueprints for deploying the three leading local server stacks on Windows: XAMPP, Internet Information Services (IIS), and WAMP.
Finally, we will explore advanced optimization techniques used by engineering teams to align local workflows with enterprise production environments.
The Architecture and Inner Workings of a Local Server
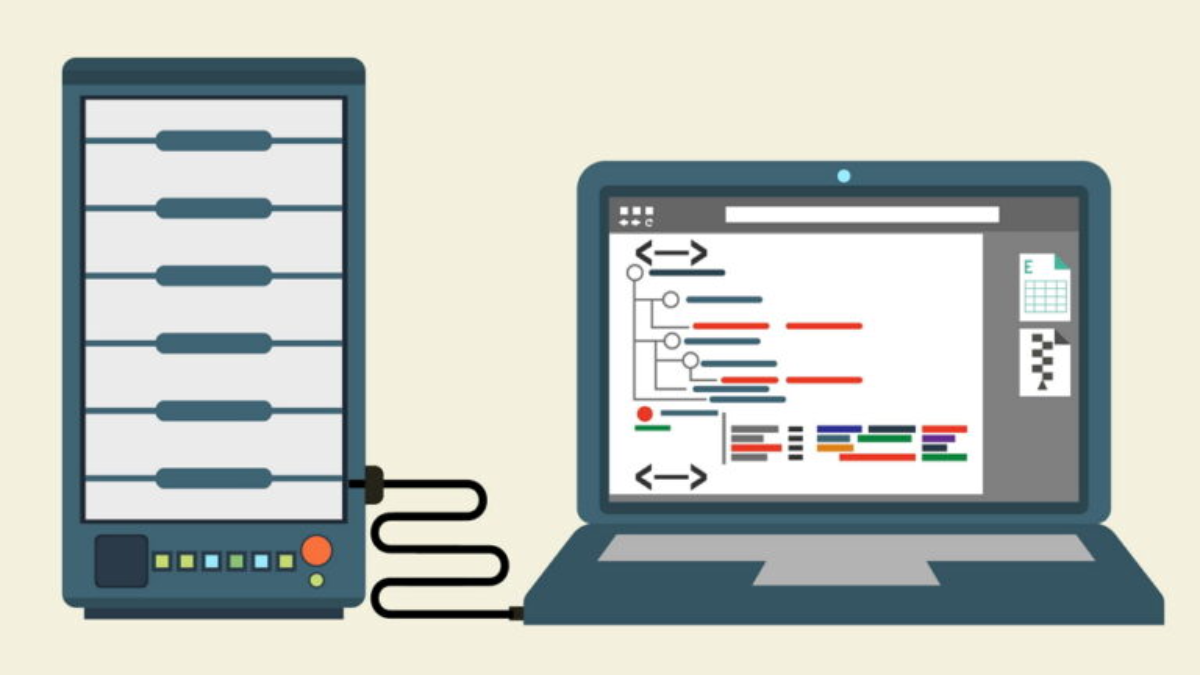
To configure and troubleshoot a local development environment effectively, you need to understand what happens beneath the graphical interface. A local web server is not a single piece of software. Instead, it is an integrated stack of server applications, interpreters, and database engines running on top of your physical hardware, working together to mimic the behavior of a remote cloud server.
The Local Host Request-Response Architecture:
[Web Browser Engine] ──► URL Request (http://localhost/myproject/) ──► Operating System Network Stack
                                                                              │
                                                                              ▼
[Local Web Server Engine] ◀── Loopback Target (IP: 127.0.0.1) ────────────────┘
    │
    ├──► Static Asset Handler (.html, .css, .js, .png) ──► Direct Static Output File Delivery
    │
    └──► Scripting Execution Module (.php) ──► [PHP Interpreter Engine] ──► [Database Server (Port 3306)]
                                                     │
                                                     ▼
[Web Browser Engine] ◀── Parsed HTML/CSS System Output ──────────────────────────────────────────────
The Client-Server Model in a Closed System
In everyday internet browsing, when a user enters a domain name like [https://www.example.com](https://www.example.com) into their browser, the operating system's networking stack passes the request to a Domain Name System (DNS) server. The DNS server resolves the domain into an external IP address. The request then travels across the global internet infrastructure until it reaches the physical server hosting the website.
In a local server environment, this entire journey takes place inside your computer. This closed loop relies on a networking mechanism known as the loopback address.
Understanding the Loopback Address and localhost
When you type http://localhost into your web browser, your computer does not send data out to the local network or the internet. Instead, the operating system intercepts the request using an internal look-up system.
-
The Windows Hosts File: In Windows, the primary authority for local name resolution is the hosts file, located at C:\Windows\System32\drivers\etc\hosts. By default, this file maps the hostname localhost to the IPv4 loopback address 127.0.0.1 and the IPv6 loopback address ::1.
-
The 127.0.0.1 Protocol: The IP address 127.0.0.1 is universally reserved by network standards for loopback communication. When network software sends data packets to this address, the Windows TCP/IP stack automatically loops them back to the system's own internal network layer.
-
Port Allocation Systems: A web server listens continuously for incoming traffic on specific virtual entry points called ports. Unencrypted web traffic (HTTP) uses Port 80 by default, while encrypted traffic (HTTPS) uses Port 443. When your local server stack is active, it claims exclusive ownership of Port 80 on the loopback address, waiting to capture local development requests.
The Functional Core Components of the Server Stack
A local web application requires three distinct software layers working in harmony: the web server engine, the programming language interpreter, and the database management system.
The Architecture Core Stack Matrix:
┌───────────────────────────┐
│     HTTP Web Engine       │ ➔ Manages network sockets, processes ports, routes paths
└─────────────┬─────────────┘
              │
              ▼
┌───────────────────────────┐
│   Scripting Interpreter   │ ➔ Processes logic, compiles templates, executes backend code
└─────────────┬─────────────┘
              │
              ▼
┌───────────────────────────┐
│     Database Engine       │ ➔ Stores application states, tables, profiles, indexes
└───────────────────────────┘
The HTTP Web Engine (Apache or IIS)
The web server engine is the backbone of the stack. It runs as a persistent background service, listening on Port 80 for incoming loopback requests. When a request arrives, the engine checks the file path.
If the request is for a static asset—such as a plain HTML page, a CSS stylesheet, client-side JavaScript, or an image—the engine retrieves the file from your drive and sends it directly back to the browser without extra processing.
The Scripting Interpreter (PHP)
Modern websites rely on dynamic functionality. When a browser requests a file ending in .php, the web server engine cannot read the code natively. Instead, it passes the file to the PHP interpreter engine through a fast connection interface like FastCGI.
The PHP interpreter runs the backend programming logic, processes forms, checks database records, and generates a standard text string of HTML code. This HTML is passed back to the web server engine, which delivers it to the browser.
The Relational Database Management System (MySQL or MariaDB)
Dynamic web apps need an organized way to store and retrieve data, such as user accounts, blog posts, or inventory records. The database engine runs alongside the web server, typically listening on Port 3306.
During code execution, the PHP interpreter connects to the database using Structured Query Language (SQL) queries to fetch, update, or save application data.
The XAMPP Stack Architecture
XAMPP, maintained by Apache Friends, is one of the most popular local development stacks in the world. It is a completely free, open-source distribution designed to provide developers with a cross-platform setup solution.
XAMPP Structural Acronym Breakdown:
X ───► Cross-Platform Compatibility (Windows, Linux, macOS)
A ───► Apache Core HTTP Web Engine (Port 80 / 443)
M ───► MariaDB Relational Database Management System (Port 3306)
P ───► PHP Scripting Language Interpreter
P ───► Perl Programming Language Engine
Download Protocols and Prerequisites
To begin, download the official installation package directly from the Apache Friends Download Portal. It is best practice to select the version that matches the exact PHP version used by your live production server.
⚠️ Critical Windows Security Prerequisite: If you have User Account Control (UAC) active on your Windows system, avoid installing XAMPP into the default C:\Program Files directory. Windows security restrictions can block Apache and MySQL from gaining write privileges to their own configuration files. Instead, install XAMPP into a dedicated root folder, such as C:\xampp.
Step-by-Step Installation Protocol
To ensure a smooth setup, follow this structured installation sequence:
Resolving Port Conflicts (Port 80 and 443)
A common issue during setup happens when Apache fails to start because Port 80 or Port 443 is already claimed by another application. This conflict is typically caused by communication tools like Skype or built-in Windows services like Web Deployment Agent Service (MsDepSvc).
XAMPP Port Redirection Workflow:
[Port 80 Conflict Detected] ➔ Open httpd.conf ➔ Edit "Listen 80" to "Listen 8080"
                                                       │
                                                       ▼
[Port 443 Conflict Detected] ➔ Open httpd-ssl.conf ➔ Edit "Listen 443" to "Listen 4433"
                                                       │
                                                       ▼
[New Connection Path Established] ➔ Access Server via: http://localhost:8080/
How to Reassign the HTTP Port in Apache
If you need to change Apache's default ports to clear a conflict, follow these configuration adjustments:
-
Open the XAMPP Control Panel, look across the Apache row, and click the Config button. Select Apache (httpd.conf) from the dropdown menu to open the primary configuration file in Notepad.
-
Press Ctrl + F and search for the configuration line that reads:
PlaintextListen 80
-
Change the port value to an alternate, unassigned port number, such as 8080:
PlaintextListen 8080
-
Next, locate the ServerName directive line:
PlaintextServerName localhost:80
-
Modify it to match your new port configuration:
PlaintextServerName localhost:8080
-
Save the changes and close the file.
How to Reassign the HTTPS (SSL) Port
-
Click the Config button for Apache again, and open Apache (httpd-ssl.conf).
-
Search for the SSL listening line:
PlaintextListen 443
-
Change it to an alternate port number, like 4433:
PlaintextListen 4433
-
Search for the virtual host definition block:
Plaintext<VirtualHost _default_:443>
-
Update the block tag to reflect the new port assignment:
Plaintext<VirtualHost _default_:4433>
-
Save the file and restart Apache in the Control Panel. With these changes in place, you can now access your local server by including the custom port number in the URL: http://localhost:8080/.
Deploying Prototyping Files in htdocs
The root directory where XAMPP looks for web files is called htdocs, located at C:\xampp\htdocs. When you access http://localhost, the server reads the files in this folder.
To set up a new project, create a subfolder within the root directory, such as C:\xampp\htdocs\myproject\. Place your application files, like index.php, inside this subfolder.
You can then view and run your project by opening a browser and navigating to http://localhost/myproject/.
XAMPP File Storage Layout:
C:\xampp\
└── htdocs\                <- Primary Local Root Folder
    ├── dashboard\         <- Default XAMPP Dashboard files
    └── myproject\         <- Your Isolated Development Project Folder
        ├── index.php      <- Initial Entry Point Script
        ├── css\
        └── js\
Database Administration via phpMyAdmin
XAMPP includes phpMyAdmin, a web-based administration interface that makes managing your database simple.
Database Access Path:
Open Web Browser ➔ Navigate to http://localhost/phpmyadmin/
                                       │
                                       ▼
  [phpMyAdmin GUI Interface Dashboard] ➔ Create Databases / Manage User Accounts
To create a new database for your local application, follow these steps:
-
Open a browser and go to http://localhost/phpmyadmin/.
-
Click the Databases tab in the top-left corner of the dashboard.
-
In the Create database field, enter a clean, descriptive name for your database, such as db_myproject.
-
Leave the collation dropdown set to utf8mb4_general_ci for excellent international character support, then click Create.
-
When connecting your backend PHP code to the database, use these default XAMPP connection parameters:
-
Database Host: 127.0.0.1 (or localhost)
-
Database User: root
-
Database Password: (Leave this completely blank)
-
Database Name: db_myproject
-
The Microsoft IIS Environment
Internet Information Services (IIS) is a professional, enterprise-grade web server engine developed by Microsoft. Unlike XAMPP or WAMP, which install third-party applications onto your machine, IIS is built directly into the Windows operating system.
It is an excellent choice for developers who want a production-mode environment, especially those working with Microsoft web technologies like ASP.NET or configuring high-performance PHP environments on Windows architecture.
IIS Functional Framework:
[Windows OS Core Kernel] ──► Built-in IIS Web Server Layer (Optional Windows Feature)
                                      │
                                      ├──► Native Handler Engine (ASP.NET / Static Files)
                                      └──► FastCGI Extension Engine (PHP Interpreter Execution)
Activating IIS via Windows Features
Because IIS is a built-in Windows component, you do not need to download an installer. You simply activate it using the Windows Features menu.
-
Press the Windows Key, type "Turn Windows features on or off", and press Enter to open the system configuration window.
-
Scroll through the list and locate the Internet Information Services option. Click the checkbox next to it to select the core server components.
-
Click the expand button next to Internet Information Services, then navigate to World Wide Web Services -> Application Development Features.
-
Check the box for CGI. This component is essential because it allows IIS to use FastCGI to communicate with the PHP scripting interpreter.
-
Click OK. Windows will automatically locate the required system files, install the server components, and activate the core IIS services background processes. Once the setup finishes, click Close.
Verification and Default Directory Structure
To verify that the server engine is active, open a web browser and go to http://localhost. If the installation went smoothly, you will see the official blue Microsoft IIS welcome page.
IIS Default System Directory:
C:\inetpub\
└── wwwroot\               <- Primary Web Storage Root
    ├── iisstart.htm       <- Default Welcome Web Page File
    └── iisstart.png
The system establishes a secure directory structure to host your web files, located at C:\inetpub\wwwroot. This folder serves as the central root directory for all default IIS web traffic.
Configuring the PHP Environment on IIS
IIS does not include PHP out of the box, so you must install and configure the PHP environment manually.
IIS PHP Execution Chain:
Local Loopback Request ➔ IIS Web Server Pipeline ➔ FastCGI Module Handler
                                                           │
                                                           ▼
Browser Receives Clean HTML ◀── Output Return ─── [php-cgi.exe Interpreter]
Step 1: Download the PHP Binary Package
-
Visit the official PHP for Windows Download Portal.
-
Select the latest stable version of PHP. Crucial Step: You must download the Non-Thread Safe (NTS) x64 version. The Non-Thread Safe version is specifically optimized to deliver maximum performance and stability under the IIS FastCGI architecture.
-
Extract the downloaded ZIP file directly into a clean root folder on your drive, such as C:\php.
Step 2: Configure the php.ini File
-
Open your new C:\php folder and locate the file named php.ini-development. Duplicate this file and rename the copy to php.ini to create your primary runtime configuration file.
-
Open php.ini in a text editor and update these essential lines to ensure proper integration with IIS:
Ini, TOMLfastcgi.impersonate = 1 fastcgi.logging = 0 cgi.fix_pathinfo = 1 cgi.force_redirect = 0
-
Locate the extension directory setting and un-comment it by removing the leading semicolon so PHP can find its modular code libraries:
Ini, TOMLextension_dir = "ext"
-
Save the changes and close the editor.
Step 3: Map the FastCGI Module in IIS Manager
-
Open the Windows search bar, type "Internet Information Services (IIS) Manager", and launch the application.
-
In the left-hand connections panel, select your computer's node name. In the central features view, double-click the Handler Mappings icon.
Handler Mapping Configuration Parameters:
├── Request Path ──────► *.php
├── Module Type  ──────► FastCgiModule
├── Executable   ──────► C:\php\php-cgi.exe
└── Friendly Name ─────► PHP_FastCGI
-
In the Actions panel on the far right, click Add Module Mapping....
-
In the configuration window that appears, fill in these parameters exactly:
-
Request path: *.php
-
Module: Select FastCgiModule from the dropdown list.
-
Executable (optional): Click the browse button and select C:\php\php-cgi.exe.
-
Name: Enter a clear, identifiable name like PHP_FastCGI.
-
-
Click OK, then click Yes in the confirmation dialog to approve the new FastCGI processing rule. Your IIS server can now process dynamic PHP code.
Creating and Mapping a New Site in IIS
While you can drop files directly into C:\inetpub\wwwroot, a cleaner approach is to use the IIS Manager to map a dedicated folder for your project.
IIS Site Creation Process:
Create Project Folder (e.g., D:\Projects\MyNewSite)
                       │
                       ▼
Open IIS Manager ➔ Right-Click "Sites" ➔ Select "Add Website"
                       │
                       ▼
Set Site Name ➔ Map Physical Path to Folder ➔ Assign Host / Custom Port
-
Create a clean folder anywhere on your computer to hold your project files, such as C:\projects\mynewsite.
-
Inside IIS Manager, expand the connection tree in the left panel, right-click the Sites folder, and select Add Website....
-
In the configuration window, fill in these core details:
-
Site name: Enter a recognizable name, like MyNewSite.
-
Physical path: Click the browse button and choose your new project folder (C:\projects\mynewsite).
-
Binding Port: If you want to keep the Default Web Site running on Port 80, assign this site an alternate port number, like 8085.
-
-
Click OK to launch the site. You can now view your project by opening a browser and navigating to http://localhost:8085/.
The WAMP Server Architecture
WAMP (commonly known as Wampserver) is a specialized local development environment designed specifically for Microsoft Windows systems. It bundles the Apache HTTP engine, the MySQL database system, and the PHP interpreter into an easy-to-use package.
WAMP is highly regarded for its flexible modular architecture, which allows developers to switch between different versions of PHP, Apache, or MySQL with just a few clicks.
WAMP Stack Overview:
Windows OS ──► Core Wampserver System Layer
                     │
                     ├──► Apache Server Engine
                     ├──► MySQL / MariaDB Databases
                     └──► Hot-Swappable PHP Runtime Engine (Switch versions via GUI)
Download and Component Prerequisites
Before installing WAMP, ensure your system has all the required runtime libraries. Because WAMP is compiled using Microsoft Visual C++, it requires various Visual C++ Redistributable Packages to run correctly.
⚠️ Important Shadows Installation Prerequisite: Download and install the Visual C++ Redistributable packages for Visual Studio 2012, 2013, 2015, and 2022 before running the WAMP installer. Missing these libraries can cause errors during installation, such as warnings about missing vcruntime140.dll or msvcr110.dll files.
Once these libraries are installed, download the official installer from the Wampserver Download Portal.
Step-by-Step Installation & Verification
-
Launch the WAMP installer with administrative privileges. Select your preferred installation language and accept the licensing terms.
-
Set the destination directory to the root of your drive, such as C:\wamp or C:\wamp64 (depending on whether your system is 32-bit or 64-bit). Avoid installing into the C:\Program Files directory to prevent Windows security conflicts.
-
Follow the prompts through the installation assistant. The installer will ask you to choose a default web browser and text editor; you can select your preferred tools or leave them set to the default options. Click Install to finish the setup.
WAMP Status Indicators (Taskbar Icon Lifecycle):
[RED]    ➔ All core background services are currently offline
[ORANGE] ➔ Server engine is active, but database engine or ports are blocked
[GREEN]  ➔ All services (Apache, MySQL, MariaDB) are successfully running offline
-
Launch Wampserver using the desktop shortcut. Look at your Windows taskbar system tray in the bottom right corner of your screen to track the status of the services:
-
Red Status: All background server services are offline.
-
Orange Status: The web server engine started successfully, but either the database engine is blocked or the ports are in use by another application.
-
Green Status: All services (Apache, MySQL, and MariaDB) are active and running properly.
-
To verify the setup, open a browser and go to http://localhost. WAMP will display its comprehensive configuration dashboard, showing your active software versions and configured project extensions.
Managing PHP and Database Versions
One of WAMP's best features is how easy it makes managing different versions of your development software. If a production server uses an older or newer version of PHP than your local default, you can easily match it without reinstalling the application.
Version Selection Path:
Left-Click WAMP Tray Icon ➔ Select "PHP" ➔ Hover Over "Version" ➔ Click Desired PHP Release
                                                                           │
                                                                           ▼
WAMP Restarts Automatically ➔ Green Icon Reappears ➔ Environment Matches Target Version
-
Move your mouse to the system tray and left-click the green WAMP icon.
-
In the popup menu, hover over the PHP option, then move to the Version sub-menu.
-
You will see a list of installed PHP versions. Click the version you need for your project. The WAMP icon will turn orange as it restarts the background services, then return to green once the new version is active.
-
You can use this same process to switch versions for your Apache server engine or MySQL database manager, making it simple to accurately match your production environment.
Project File Allocation in www
WAMP Directory Structure:
C:\wamp64\
└── www\                   <- Primary Local Web Root Folder
    ├── index.php          <- Default WampServer Dashboard Landing Page
    └── ecommerce_pro\     <- Your Isolated Development Project Folder
        └── index.php      <- Project Entry Point
WAMP stores its web files in a root directory named www, located at C:\wamp64\www (or C:\wamp\www on 32-bit systems).
To set up a project, create a subfolder within the root directory, such as C:\wamp64\www\ecommerce_pro\. Drop your project files inside this subfolder.
You can then run and view your project by opening a browser and navigating to http://localhost/ecommerce_pro/.
Enterprise Local Server Optimization Techniques
Once your local server environment is up and running, you can apply several professional optimization techniques to improve performance, simplify navigation, and make development smoother.
Implementing Virtual Hosts (Custom Local Domains)
Typing URLs like localhost/myproject/subfolder/ for every project can become tedious. Virtual Hosting allows you to map clean, custom local domain names—like [http://myproject.local](http://myproject.local)—directly to your local development folders.
Virtual Host Resolution Loop:
Browser Request (http://myproject.local) ➔ Windows Hosts File (Redirects to 127.0.0.1)
                                                                    │
                                                                    ▼
Custom Domain Loaded ◀── Server Matches Path ─── Apache httpd-vhosts.conf Block
Step 1: Update the Windows Hosts File
-
Click the Windows Start menu, search for Notepad, right-click the application icon, and choose Run as administrator.
-
Click File -> Open, and navigate to this directory path: C:\Windows\System32\drivers\etc\. Change the file type filter in the bottom right corner from "Text Documents (.txt)" to All Files (.*), then select and open the hosts file.
-
Scroll to the bottom of the file and add a new line to map your custom local domain name to the loopback address:
Plaintext127.0.0.1 myproject.local
-
Save the file and close Notepad.
Step 2: Configure Virtual Hosts in Apache
-
Open your Apache configuration folder. For XAMPP, open this file in a text editor: C:\xampp\apache\conf\extra\httpd-vhosts.conf.
-
Scroll to the end of the file and add a new configuration block to define your local site:
Apache<VirtualHost *:80> ServerAdmin webmaster@myproject.local DocumentRoot "C:/xampp/htdocs/myproject" ServerName myproject.local ErrorLog "logs/myproject.local-error.log" CustomLog "logs/myproject.local-access.log" common <Directory "C:/xampp/htdocs/myproject"> Options Indexes FollowSymLinks Includes AllowOverride All Require all granted </Directory> </VirtualHost> -
Save the file, restart your Apache service using the Control Panel, and open a browser. You can now access your project directly by typing [http://myproject.local](http://myproject.local).
Adjusting PHP Performance Settings for Large Projects
Modern content management systems (like WordPress or Drupal) and frameworks (like Laravel) often require more system resources than a standard local installation provides out of the box. If your local site throws errors about memory limits or execution times, you can update your php.ini file to provide more resources.
PHP Performance Parameter Upgrades:
├── max_execution_time = 300   (Prevents long script timeouts)
├── memory_limit       = 512M  (Provides ample processing RAM)
├── post_max_size      = 256M  (Allows large data transfers)
└── upload_max_filesize = 256M  (Allows large media uploads)
Open your active php.ini file and adjust these key resource settings:
-
max_execution_time = 300
Increases the maximum time a script can run from 30 seconds to 300 seconds, which prevents complex database updates from timing out during development.
-
memory_limit = 512M
Allocates up to 512MB of RAM to PHP, providing plenty of memory for large frameworks or data-heavy applications.
-
upload_max_filesize = 256M
Raises the maximum file size for uploads from 2MB to 256MB, allowing you to easily upload large media files, plugins, or database backups.
-
post_max_size = 256M
Matches your upload limit to ensure large form submissions and file packages pass through safely.
After saving your changes in php.ini, remember to restart your web server engine to apply the new resource limits.
Conclusion: Setting the Gold Standard for Your Environment
Configuring an offline local development server is an investment in your productivity and code quality. Whether you select the cross-platform flexibility of XAMPP, the deep Windows system integration of IIS, or the hot-swappable version swapping of WAMP, you gain a powerful workspace where you can safely push boundaries and test applications.
By establishing realistic limits, implementing structured virtual hosts, and maintaining clean folder configurations, you minimize the risk of deployment surprises. This proactive configuration workflow ensures that your web application transitions smoothly from a local prototype to a flawless live release.
Final Environmental Review Matrix
| Development Choice | Ideal Architecture Use Case | System Bottleneck Avoided | Standout Feature |
| XAMPP Stack | Rapid deployment for standard cross-platform PHP/MariaDB projects. | Eliminates complex component linking and manual pathway registration. | One-click unified control dashboard layout. |
| Microsoft IIS | Enterprise development targeting production-matched Windows web hosting. | Removes unnecessary middle layers by using the built-in Windows kernel handler. | Ultra-efficient native FastCGI module handler. |
| WAMP Server | Agile developers who frequently test applications across multiple PHP versions. | Avoids installation lock-in by supporting isolated, swappable components. | Smooth, on-the-fly version switching right from the system tray. |
Frequently Asked Questions (FAQ)
1. What is a local server, and why do developers use one?
A local server is a complete web server environment installed on your own computer. It allows developers to build, test, debug, and optimize websites or web applications without uploading files to a live hosting server. This reduces the risk of breaking a production website and provides a safe environment for development.
2. What is the difference between localhost and 127.0.0.1?
Both refer to your own computer.
- localhost is a hostname.
- 127.0.0.1 is the IPv4 loopback IP address.
- ::1 is the IPv6 loopback address.
Typing either http://localhost or http://127.0.0.1 in most cases accesses the same local web server.
3. Which local server is best for beginners?
For most beginners, XAMPP is the easiest choice because it:
- Has a simple installation process.
- Includes Apache, PHP, MariaDB, and phpMyAdmin.
- Works on Windows, Linux, and macOS.
- Requires very little manual configuration.
4. What is the difference between XAMPP, WAMP, and IIS?
| Server | Best For | Advantages |
|---|---|---|
| XAMPP | Beginners and cross-platform developers | Easy installation, supports multiple operating systems |
| WAMP | Windows-only PHP developers | Easily switch PHP, Apache, and MySQL versions |
| IIS | Enterprise Windows environments | Native Windows integration and excellent ASP.NET support |
5. Can I develop websites without an internet connection?
Yes.
Once your local server is installed, you can:
- Build websites
- Develop PHP applications
- Run databases
- Test APIs
- Debug code
All without internet access.
6. Why does Apache fail to start?
The most common reason is a port conflict.
Applications that frequently occupy Port 80 or 443 include:
- Skype
- Microsoft IIS
- VMware
- Docker
- SQL Reporting Services
- Web Deployment Services
Changing Apache to ports 8080 and 4433 usually resolves the problem.
7. What is Port 80?
Port 80 is the default communication port used for HTTP websites.
Example:
http://localhost
internally means
http://localhost:80
8. What is Port 443?
Port 443 is the default HTTPS port used for encrypted communication.
Example:
https://localhost
internally uses
https://localhost:443
9. Why do PHP websites need Apache or IIS?
PHP files cannot be executed directly by a browser.
Instead:
Browser → Web Server → PHP Interpreter → Database → HTML Output → Browser
Apache or IIS acts as the bridge between the browser and the PHP interpreter.
10. What is phpMyAdmin?
phpMyAdmin is a browser-based interface used to manage MySQL or MariaDB databases.
It allows developers to:
- Create databases
- Create tables
- Import SQL files
- Export backups
- Manage users
- Execute SQL queries
without using command-line tools.
11. Where should I store my project files?
For XAMPP
C:\xampp\htdocs\
For WAMP
C:\wamp64\www\
For IIS
C:\inetpub\wwwroot\
Each project should be placed inside its own folder.
12. Why should I use Virtual Hosts?
Virtual Hosts make local development cleaner.
Instead of:
http://localhost/projectname/
you can access
http://project.local
Benefits include:
- Easier project management
- Cleaner URLs
- Better simulation of production environments
- Improved compatibility with modern frameworks
13. What is the Hosts file?
The Windows Hosts file manually maps domain names to IP addresses.
Typical location:
C:\Windows\System32\drivers\etc\hosts
Example:
127.0.0.1 project.local
This tells Windows that project.local points to your own computer.
14. Why is PHP memory_limit important?
Large frameworks like Laravel, WordPress, Magento, or Drupal require more memory.
Increasing:
memory_limit = 512M
helps prevent:
- Fatal memory errors
- Incomplete script execution
- Plugin installation failures
15. What does max_execution_time control?
This setting determines how long PHP scripts can run.
Default:
30 seconds
Recommended for development:
300 seconds
Useful when:
- Importing databases
- Installing CMS packages
- Running migrations
- Processing large files
16. Is WAMP better than XAMPP?
Neither is universally better.
Choose XAMPP if you:
- Work across Windows, Linux, and macOS
- Want quick installation
- Prefer simplicity
Choose WAMP if you:
- Only use Windows
- Frequently switch PHP versions
- Need flexible testing environments
17. Why do developers use IIS instead of Apache?
Developers working with Microsoft technologies often prefer IIS because it:
- Is built directly into Windows
- Offers excellent ASP.NET support
- Integrates with Windows authentication
- Delivers high performance through FastCGI
18. Can I run multiple local websites simultaneously?
Yes.
You can host multiple projects using:
- Virtual Hosts
- Different ports
- Multiple IIS sites
- Multiple Apache VirtualHost configurations
Example:
http://project1.local
http://project2.local
http://crm.local
http://shop.local
19. Is a local server secure?
A local server is generally safe because it only accepts requests from your own computer.
However, you should still:
- Keep software updated
- Avoid exposing ports to the internet
- Use strong database passwords when testing shared environments
- Disable unnecessary services
20. What are the advantages of developing locally before deployment?
Using a local development server provides numerous benefits, including:
- Faster development cycles
- No hosting costs during testing
- Safe experimentation
- Easier debugging
- Better version control integration
- Offline development capability
- Reduced risk of production downtime
- More reliable deployments
It has become the industry standard workflow for professional web development teams.