The Complete Guide to Mounting, Unmounting, and Managing ISO Image Files in Windows Operating Systems
7 days ago
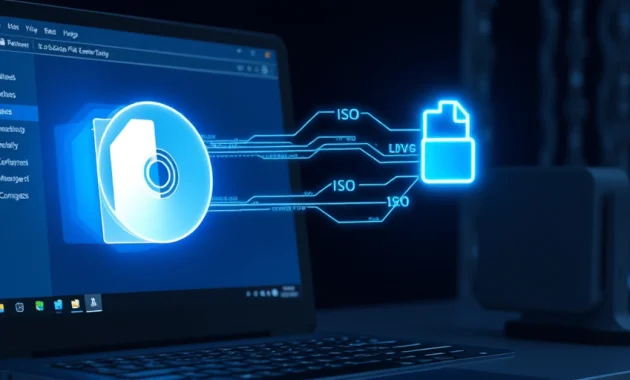
Modern software distribution, operating system deployment, and digital archival processes rely heavily on virtual optical disk images, commonly known as ISO files.
Whether you are an IT administrator deploying Windows images across an enterprise network, a software developer testing application installers, or a casual user installing specialized software or legacy media, knowing how to open, mount, and manage ISO files efficiently is an essential digital skill.
This guide explores the mechanics of ISO image files, walking you through native Windows mounting methods, open-source third-party utilities, archive extraction tools, command-line power tools, and troubleshooting techniques across different versions of the Microsoft Windows operating system.
What is an ISO File and How Does Virtual Mounting Work?
To work with ISO files effectively, you first need to understand what an ISO image actually is and how modern operating systems handle virtual storage media.
ISO File System Concept:
┌─────────────────────────────────────────────────────────────┐
│                 Physical Optical Disk                       │
│    (CD-ROM / DVD-ROM / Blu-ray Track Sector Data)           │
└──────────────────────────────┬──────────────────────────────┘
                               │
                               ▼ Sector-by-Sector Binary Bit Copy
┌─────────────────────────────────────────────────────────────┐
│                   ISO Disk Image (.iso)                     │
│    (Contains ISO 9660 or UDF File System Structures)       │
└──────────────────────────────┬──────────────────────────────┘
                               │
                               ▼ Windows Virtual Optical Drive Engine
┌─────────────────────────────────────────────────────────────┐
│                   Mounted Virtual Drive                     │
│    (Assigned Drive Letter e.g., D:, E:, F: in File Explorer) │
└─────────────────────────────────────────────────────────────┘
1. Defining the ISO Image Format
An ISO file (often referred to as an ISO image) is an exact, uncompressed binary archive of an entire optical disc—such as a CD-ROM, DVD-ROM, or Blu-ray Disc. Named after the ISO 9660 file system standard used for optical media (and its successor, the Universal Disk Format / UDF standard), an ISO file contains not just individual files and folders, but the entire raw sector-by-sector structure of the physical disc, including bootloader records, volume metadata, and directory hierarchies.
2. Physical Disks vs. Virtual Drive Mounting
In early computing environments, accessing the contents of an ISO file required "burning" the image file onto a physical CD-R or DVD-R disc using specialized software and a physical optical disc burner drive.
Modern operating systems eliminate this extra step through a process called virtual mounting:
-
Virtual Optical Disk Engine: Software built into the operating system creates a simulated, virtual hardware device that mimics a physical optical drive (virtual drive).
-
Loopback File System Driver: When you mount an ISO file, the operating system routes read/write requests to the .iso file on your hard drive or SSD, assigning it a virtual drive letter (e.g., Drive D:, E:, or F:).
-
Instant Access: To Windows and any running software applications, the mounted ISO behaves identically to a physical DVD inserted into a physical disc drive, allowing you to run installers, copy files, or view media instantly without burning physical media.
Native Mounting via Windows File Explorer (Windows 8, 10, and 11)
Starting with Windows 8, Microsoft introduced built-in support for ISO files directly within Windows File Explorer (formerly known as Windows Explorer). This feature allows users to mount and unmount ISO images with a single click—no third-party software required.
Native Windows Explorer Mounting Workflow:
[Locate .iso File in Explorer] ──► Right-Click File ──► Select "Mount"
                                                            │
                                                            ▼
[Virtual Optical Drive Created] ◄── Assigned Drive Letter (e.g., Drive E:)
                                                            │
                                                            ▼
[Finished Accessing Files] ──────► Right-Click Virtual Drive ──► Select "Eject"
Method 1: The Native Context Menu Mount
Alternative: You can also double-click the .iso file directly if Windows File Explorer is set as your default handler for ISO files.
File Explorer Ribbon Integration
In Windows 10 and 11, File Explorer also features context-sensitive ribbon controls:
-
Click once on the .iso file inside File Explorer to highlight it.
-
Look at the top menu bar (Ribbon interface). A new contextual tab labeled Disc Image Tools will appear under Manage.
-
Click the Mount button in the ribbon to mount the image immediately.
Mounting ISO Files Using Open-Source Utilities (WinCDEmu)
While native ISO mounting works seamlessly on Windows 8, 10, and 11, legacy systems like Windows 7 lack native mounting capabilities and require a third-party utility.
Additionally, power users on newer systems often prefer specialized tools like WinCDEmu for its advanced virtual drive options, lightweight resource footprint, and open-source transparency.
WinCDEmu Architecture Advantages:
├── Open-Source Transparency ➔ Fully free, open-source tool without bloatware
├── Portable Version        ➔ Runs directly without full system driver installations
├── Multi-Format Support     ➔ Handles ISO, CUE, NRG, MDS/MDF, CCD, and IMG files
└── Custom Drive Letters     ➔ Manually assign specific drive letters to images
Method 2: Mounting with WinCDEmu
WinCDEmu is a tiny, open-source utility that allows you to mount optical disc images by simply clicking on them in Windows File Explorer.
Step 1: Download and Installation
-
Download the installer from the official WinCDEmu website or trusted open-source repositories.
-
Run the installer. During setup, WinCDEmu will ask for permission to install its lightweight virtual bus driver (WinCDEmu Virtual Bus Driver). Click Install.
Step 2: Mounting an ISO Image
-
Open File Explorer and locate your target .iso file.
-
Right-click the .iso file and select Select drive letter & mount from the context menu.
-
A small dialog window will pop up asking you to select an available Drive Letter (e.g., Drive H:), select the Drive Type (Data, Audio, or DVD-Video), and choose whether to preserve the drive assignment across system reboots.
-
Click OK. The virtual drive will instantly initialize and appear under This PC.
WinCDEmu Context Menu Parameters:
Right-Click ISO ──► "Select drive letter & mount" ──► Choose Letter (e.g., H:) ──► Click OK
Step 3: Unmounting via WinCDEmu
To unmount an image managed by WinCDEmu:
-
Right-click the virtual drive in File Explorer and select Eject.
-
Alternative: Double-click the .iso file again (if configured in settings) to unmount it instantly.
Accessing ISO Contents Without Mounting (WinRAR & 7-Zip)
Sometimes, you don't need to mount an ISO file to create a virtual optical drive; you simply want to extract a few specific files or view the archive's contents. In these cases, file archive utilities like WinRAR or 7-Zip offer a quick, lightweight alternative.
Extraction vs. Mounting Distinction:
┌─────────────────────────────────────────────────────────────┐
│                  Virtual Drive Mounting                     │
│  - Emulates physical hardware media (Runs installers)        │
│  - Creates temporary drive letters in Windows File Explorer  │
└─────────────────────────────────────────────────────────────┘
                               vs
┌─────────────────────────────────────────────────────────────┐
│                  File Archive Extraction                    │
│  - Reads ISO files like standard compressed archives (.zip) │
│  - Unpacks raw contents directly into target local folders   │
└─────────────────────────────────────────────────────────────┘
Method 3: Inspecting and Extracting ISO Files via WinRAR / 7-Zip
Using WinRAR
-
Install WinRAR on your computer.
-
Locate your .iso file in File Explorer, right-click it, and select Open with WinRAR (or right-click and choose Extract to [Folder Name]).
-
The WinRAR interface will display all files and folders contained inside the ISO file. You can drag and drop specific files directly onto your desktop or extract the entire archive to a folder on your hard drive.
Using 7-Zip (Free & Open-Source)
-
Install 7-Zip on your system.
-
Right-click the target .iso file, hover over 7-Zip in the context menu, and select Open archive (or Extract Files...).
-
Browse the archive contents safely without modifying your operating system's virtual drive map.
💡 Note: Since archive extraction simply copies files to a folder rather than creating a virtual drive, no unmounting or ejecting is required.
Advanced Command-Line Mounting via PowerShell and CMD
IT professionals, system administrators, and automation script writers often need to mount and unmount ISO files headlessly using command-line interface (CLI) commands. Windows 10 and 11 include robust PowerShell cmdlets designed specifically for managing disc images.
PowerShell Cmdlet Pipeline:
Mount-DiskImage -ImagePath "C:\Path\To\File.iso" ──► System Mount
Get-DiskImage -ImagePath "C:\Path\To\File.iso"   ──► Status Check
Dismount-DiskImage -ImagePath "C:\Path\To\File.iso" ──► System Dismount
Command-Line Method A: Mounting ISO Files via PowerShell
1. Mounting an ISO Image
Open PowerShell as Administrator and execute the Mount-DiskImage cmdlet:
Mount-DiskImage -ImagePath "C:\Users\Public\Downloads\Windows10.iso"
Windows will mount the image in the background and output information showing the storage type and status (Attached: True).
2. Determining the Assigned Drive Letter
To verify which drive letter was assigned to the mounted ISO, pipe the result to Get-Volume:
Get-DiskImage -ImagePath "C:\Users\Public\Downloads\Windows10.iso" | Get-Volume
This returns a clean summary table showing the Drive Letter, Volume Name, File System, and Health Status.
3. Unmounting / Dismounting an ISO Image
To safely unmount the ISO file via PowerShell, run the Dismount-DiskImage cmdlet:
Dismount-DiskImage -ImagePath "C:\Users\Public\Downloads\Windows10.iso"
Command-Line Method B: Automating Batch Script Mounts
If you are creating an automated deployment script in a standard Command Prompt (cmd.exe) batch file, you can invoke PowerShell commands inline:
:: Batch script to mount ISO image headlessly
powershell -Command "Mount-DiskImage -ImagePath 'C:\IsoFiles\Setup.iso'"

:: Run installer from mounted virtual drive
E:\setup.exe /quiet

:: Batch script to unmount ISO image after setup completes
powershell -Command "Dismount-DiskImage -ImagePath 'C:\IsoFiles\Setup.iso'"
Comprehensive Comparison of ISO Handling Methods
Choose the right ISO handling method based on your operating system, software requirements, and workflow needs:
| Evaluation Feature | Method 1: Windows File Explorer | Method 2: WinCDEmu Utility | Method 3: WinRAR / 7-Zip | Method 4: PowerShell CLI |
| Supported OS | Windows 8, 10, 11 | Windows 7, 8, 10, 11 | Windows 7, 8, 10, 11 | Windows 8, 10, 11 |
| Installation Required? | ❌ No (Built-in native tool) | 🌐 Yes (Lightweight open-source driver) | 🌐 Yes (Archive manager application) | ❌ No (Built-in native engine) |
| Virtual Drive Creation? | ✅ Yes | ✅ Yes | ❌ No (Direct extraction only) | ✅ Yes |
| Legacy Format Support | ⚠️ ISO and VHD/VHDX only | ✅ ISO, CUE, NRG, MDS, CCD, IMG | ✅ Wide range of archive types | ✅ ISO and VHD/VHDX only |
| Automation & Scripting | ❌ Manual GUI steps | ⚠️ Limited command-line tools | ⚠️ Command-line archive extraction | ✅ Highly scriptable via PowerShell |
| Best Used For | Fast, everyday mounting on modern systems | Legacy Windows 7 systems or non-ISO image formats | Viewing or extracting individual files without mounting | Enterprise IT scripts, deployment automation, and silent installs |
Troubleshooting Common ISO Mounting Errors
While mounting ISO files is usually straightforward, you may occasionally encounter errors. Here is how to diagnose and resolve the most common issues.
ISO Troubleshooting Flowchart:
[ISO Mount Error Occurs]
       │
       ├──► "The disc image file is corrupted" ──► Check sparse flags / re-download file
       │
       ├──► "Mount" Option Missing ──────────────► Restore default File Explorer associations
       │
       └──► Virtual Drive Locked / Access Denied ──► Terminate background process / PowerShell Force Dismount
Issue 1: "The disc image file is corrupted"
This error often occurs when trying to mount an ISO file downloaded from the web, even if the file itself is fine. It usually happens because Windows marks files downloaded from the internet as untrusted (Mark of the Web / Sparse Attribute).
Solution: Unblock the ISO File
-
Right-click the target .iso file and select Properties.
-
Under the General tab, look at the bottom section labeled Security.
-
Check the box labeled Unblock.
-
Click Apply, then click OK. Try mounting the ISO file again.
Issue 2: The "Mount" Option is Missing from Context Menu
If right-clicking an ISO file does not display the Mount option, another third-party program (like WinRAR or 7-Zip) has likely overtaken the default file association for .iso files.
Solution: Restore File Explorer Defaults
-
Press Win + I to open Settings.
-
Navigate to Apps -> Default apps.
-
Scroll down and click Choose default apps by file type.
-
Scroll down the list to locate the .iso file extension.
-
Click the application icon currently set as the default handler and switch it back to Windows Explorer.
Issue 3: Virtual Drive Will Not Eject ("Drive in Use")
If Windows refuses to unmount a virtual drive and displays a warning that the drive is currently in use, an open program or background process is actively reading files from the mounted image.
Solution: Force Dismount via PowerShell
Open PowerShell as Administrator and run the dismount cmdlet with the -ErrorAction override parameter, or close active applications accessing the virtual drive letter:
Dismount-DiskImage -ImagePath "C:\Path\To\LockedFile.iso" -ErrorAction SilentlyContinue
Conclusion: Mastering Optical Image Workflows
Knowing how to mount, unmount, and extract ISO files is an essential skill for managing modern digital software.
-
For modern systems running Windows 8, 10, or 11, the built-in Windows File Explorer context menu offers the fastest way to mount and eject ISO files without extra software.
-
For legacy Windows 7 machines or non-standard optical image formats (like .nrg or .cue), lightweight open-source utilities like WinCDEmu provide reliable virtual drive management.
-
For quick file extraction, 7-Zip or WinRAR let you grab specific files without creating a virtual drive.
-
For automation and enterprise deployment, PowerShell cmdlets give you full command-line control over disc images.
By selecting the right method for your operating system and workflow, you can streamline software installations, manage system backups, and work with virtual media quickly and efficiently.
Frequently Asked Questions (FAQ)
1. What is an ISO file?
An ISO file is a complete digital copy of an optical disc, such as a CD, DVD, or Blu-ray. It stores every file, folder, boot record, and file system structure in a single image file, allowing users to preserve or distribute software exactly as it appears on the original disc.
2. What does mounting an ISO file mean?
Mounting an ISO file means creating a virtual optical drive that allows Windows to treat the ISO as if it were a physical DVD or CD inserted into your computer. Instead of extracting the contents, Windows assigns a drive letter (such as D: or E:) so you can browse and run files directly.
3. Do I need third-party software to open an ISO file?
Not necessarily. Windows 8, Windows 10, and Windows 11 include native ISO mounting support through File Explorer. Simply right-click the ISO file and choose Mount. Older operating systems like Windows 7 require third-party software such as WinCDEmu or Virtual CloneDrive.
4. Can I mount an ISO file without burning it to a DVD?
Yes. Modern Windows operating systems allow virtual mounting, which eliminates the need to burn ISO files to physical media. This is faster, more convenient, and avoids wasting blank discs.
5. How do I mount an ISO file in Windows 10 or Windows 11?
Follow these steps:
- Open File Explorer.
- Locate the ISO file.
- Right-click the file.
- Select Mount.
- Windows will create a virtual DVD drive automatically.
- Open the new drive under This PC to access its contents.
6. How do I unmount or eject an ISO file?
After you're finished using the ISO:
- Open This PC.
- Locate the virtual DVD drive.
- Right-click the drive.
- Select Eject.
This removes the virtual drive without deleting the ISO file itself.
7. Can I simply extract an ISO instead of mounting it?
Yes. If you only need a few files, applications such as 7-Zip or WinRAR can open ISO files like standard archives. This allows you to extract files directly without creating a virtual drive.
8. What is the difference between mounting and extracting an ISO?
Mounting
- Creates a virtual DVD drive.
- Preserves the original folder structure.
- Allows installers and bootable software to function normally.
Extracting
- Copies files into a regular folder.
- Does not create a virtual drive.
- Ideal for accessing individual files without running installers.
9. Can I install Windows directly from an ISO file?
Yes. Mount the ISO, open the virtual drive, and run setup.exe. If you're performing a clean installation, you can also create a bootable USB drive using tools like Microsoft's Media Creation Tool or Rufus.
10. Which Windows versions support native ISO mounting?
Native ISO mounting is available in:
- Windows 8
- Windows 8.1
- Windows 10
- Windows 11
Windows 7 does not include built-in ISO mounting support.
11. Why is the "Mount" option missing from my right-click menu?
This usually happens because another program, such as WinRAR or 7-Zip, has become the default application for ISO files.
To restore Windows mounting:
- Open Settings
- Navigate to Apps → Default Apps
- Locate the .iso file extension
- Set Windows Explorer as the default application
12. Why does Windows say my ISO file is corrupted?
Possible causes include:
- An incomplete or damaged download
- File corruption during transfer
- Windows security blocking downloaded files
- Storage device errors
Try downloading the ISO again or right-click the file, select Properties, and click Unblock if the option is available.
13. Can I mount multiple ISO files at the same time?
Yes. Windows supports mounting multiple ISO images simultaneously. Each mounted image receives its own virtual drive letter.
14. Which third-party ISO mounting software is recommended?
Popular options include:
- WinCDEmu (Free and open source)
- Virtual CloneDrive
- DAEMON Tools Lite
- PowerISO
- UltraISO
Each supports additional image formats beyond standard ISO files.
15. What image formats does WinCDEmu support?
Besides ISO files, WinCDEmu supports:
- CUE
- NRG
- IMG
- CCD
- MDS
- MDF
This makes it useful for handling older optical disc formats.
16. Can I mount ISO files using PowerShell?
Yes. Windows includes built-in PowerShell commands.
Mount an ISO:
Mount-DiskImage -ImagePath "C:\ISO\Windows.iso"
Check the assigned drive:
Get-DiskImage -ImagePath "C:\ISO\Windows.iso" | Get-Volume
Unmount the ISO:
Dismount-DiskImage -ImagePath "C:\ISO\Windows.iso"
17. Is mounting an ISO file safe?
Yes, provided the ISO comes from a trusted source. Mounting itself does not modify the image. However, any software inside the ISO can still contain malware if downloaded from an untrusted website.
Always verify downloads using official sources or checksum values (SHA-256 or MD5) whenever possible.
18. Why won't my virtual drive eject?
A virtual drive usually cannot be ejected because:
- A file inside the ISO is still open.
- An installer is still running.
- Windows Explorer is actively browsing the drive.
- Another application is accessing files.
Close all programs using the drive, then try ejecting again. If necessary, use PowerShell to dismount it.
19. Can I edit an ISO file after mounting it?
No. Mounted ISO files are read-only by design. To modify an ISO, you'll need dedicated ISO editing software such as UltraISO, PowerISO, or AnyBurn, then save the modified image as a new ISO.
20. What is the best method for working with ISO files?
The best method depends on your needs:
- Windows File Explorer: Best for everyday mounting on Windows 8/10/11.
- WinCDEmu: Excellent for Windows 7 and additional image formats.
- 7-Zip or WinRAR: Best for extracting files without mounting.
- PowerShell: Ideal for IT administrators, scripting, and automation.