The Architecture of Windows 10 Audio Subsystems: A Comprehensive Technical Guide to Microphone Activation, Optimization, and Signal Triage
6 days ago
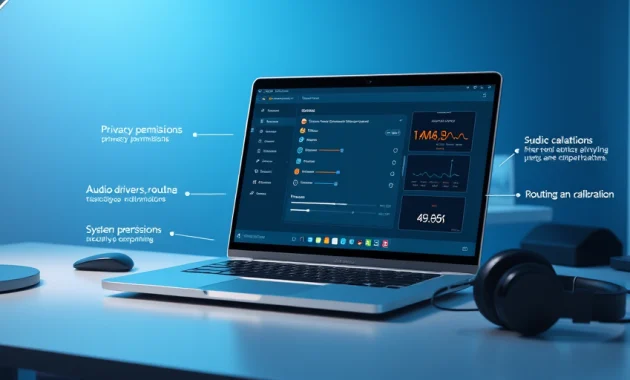
The microphone subsystem in an operating system like Windows 10 is an essential path for remote work, distributed systems collaboration, and high-fidelity digital signal processing. While a user may perceive audio input as a simple plug-and-play operation, the underlying operating system manages a complex network of privacy permissions, hardware routing tables, software drivers, and calibration matrices.
When a microphone fails to register an audio stream during an active online session—whether using an internal laptop array, an analog 3.5mm Jack interface, or a digital USB-C peripheral—the failure can stem from distinct layers within the software and hardware stack. This comprehensive technical guide analyzes the Windows 10 audio input architecture, offering step-by-step instructions across four core integration vectors: global privacy configurations, kernel-level device management, subsystem routing, and speech calibration.
The Windows 10 Audio Input Architecture
To effectively troubleshoot or optimize a microphone on Windows 10, it helps to understand how an audio signal travels from physical sound waves to a running application.
  [Physical Input] ──► [Hardware Layer] ──► [Kernel Space] ──► [User Space] ──► [Application]
   Acoustic Waves       Microphone Array     Audio Drivers     Core Audio API     Zoom / Teams
                        (ADC Conversion)     (WDM / WASAPI)    Privacy Layer      (End Stream)
-
The Physical and Hardware Layers: Sound waves hit the microphone diaphragm, which converts mechanical energy into an analog electrical signal. An internal Analog-to-Digital Converter (ADC) then translates this into a digital binary stream.
-
The Kernel Space: The hardware driver (e.g., Realtek High Definition Audio) interacts directly with the Windows Driver Model (WDM). It processes the raw binary data and exposes the physical hardware to the operating system's kernel.
-
The User Space and Core Audio API: The Windows Audio service manages the audio streams via the Windows Audio Session API (WASAPI). At this stage, Windows applies global software policies, including privacy controls and default device assignments.
-
The Application Layer: Software like Zoom, Microsoft Teams, or Discord requests an input stream from the Core Audio API. If the pipeline is clear, the application receives the digital audio for encoding and transmission.
The Four Methods for Microphone Activation
                       [Microphone Activation Vectors]
                                      │
         ┌────────────────────────────┼────────────────────────────┐
         ▼                            ▼                            ▼
[Method 1: Privacy Tier]    [Method 2: Routing Tier]    [Method 3: Hardware Tier]
 Security & Access Control   Subsystem Device Status     Driver-Level Component State
Method 1: The Privacy Layer (Global OS Access Controls)
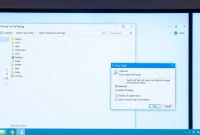
Windows 10 features a built-in security layer designed to prevent malicious background applications from accessing input hardware without user consent. If this software switch is turned off, the hardware remains functional at the driver level, but the OS completely blocks applications from reading the audio stream.
[Settings] ──► [Privacy] ──► [Microphone] ──► [Allow Global Access & App Permissions: ON]
-
Open the settings panel by pressing the Windows Key + I shortcut.
-
Navigate to the Privacy section, then select Microphone from the left-hand navigation column.
-
Locate the section labeled Allow access to the microphone on this device and click the Change button. Ensure the toggle is set to On. This opens the global hardware gate.
-
Scroll down to Allow apps to access your microphone and switch the toggle to On. This allows standard and Universal Windows Platform (UWP) desktop applications to access the audio stream.
Method 2: The Routing Tier (Sound Control Panel Management)
When a microphone is physically connected but fails to capture sound, the issue often lies within the OS audio routing tables. The subsystem may have flagged the device as inactive, hidden, or unassigned.
[Run: mmsys.cpl] ──► [Recording Tab] ──► [Right-Click: Show Hidden] ──► [Select Device: Enable]
-
Open the Run dialog by pressing Windows Key + R, type mmsys.cpl, and hit Enter. This bypasses modern menus and opens the core Sound Control Panel.
-
Switch to the Recording tab at the top of the window to display all configured audio input channels.
-
Right-click any empty space within the device list container and check both Show Disabled Devices and Show Disconnected Devices. This forces the subsystem to display inactive hardware endpoints.
-
Identify your target microphone. If the icon is grayed out, right-click the device and select Enable.
-
With the device highlighted, click the Set Default button to make it the primary system input, then click Apply and OK.
Method 3: The Hardware Tier (Kernel Device Manager Verification)
If a device fails to appear in the Sound Control Panel, it usually points to a driver-level issue or a disabled hardware component within the kernel management layer.
-
Press Windows Key + X to open the Quick Link menu, then select Device Manager.
-
Expand the Audio inputs and outputs category to view active logical audio streams. If your device is missing, expand Sound, video and game controllers to view the physical audio chipsets.
-
Locate the driver assigned to your input hardware (e.g., Intel Smart Sound Technology or Realtek Audio).
-
Right-click the device. If the context menu displays Enable device, click it to load the system driver into kernel memory.
-
If a yellow warning triangle appears next to the device icon, select Update driver, choose Search automatically for drivers, or manually re-install the vendor's specialized audio driver framework.
Method 4: The Calibration Tier (Ease of Access Speech Wizard)
Once the microphone is enabled and routed correctly, it must be calibrated within the user subsystem to ensure input volume, gain levels, and clarity match the operating system's expectations.
[Control Panel] ──► [Ease of Access] ──► [Speech Recognition] ──► [Set up microphone]
-
Open the classic Windows Control Panel and navigate to the Ease of Access category.
-
Select Speech Recognition, then click the Set up microphone action link.
-
Choose your hardware configuration type from the menu: Headset Microphone, Desktop Microphone, or Other (for built-in arrays). Click Next.
-
The system will display a specific calibration phrase. Read the sentence aloud in a natural speaking voice to train the Windows subsystem's auto-gain controls.
-
Once the input indicator registers consistent green levels, click Next and then Finish to save the operating system's software gain adjustments.
Technical Configuration Matrix
| Vector Domain | Primary Diagnostic Utility | Core Underlying Component | Remediation Failure Mode |
| Privacy Security | Settings App (Settings > Privacy) | Application Security Policy | Input stream blocked without application error logs. |
| Subsystem Routing | Sound Control Panel (mmsys.cpl) | WASAPI Device Mapping Matrix | Microphone hardware runs properly but captures no active signal. |
| Kernel Components | Device Manager (devmgmt.msc) | WDM Hardware Drivers | Hardware is completely invisible to operating system software layers. |
| Signal Calibration | Speech Wizard (Ease of Access) | Software Auto-Gain Adjustments | Audio signal is functional but captured audio is muffled or distorted. |
FAQ
1. Why is a microphone not working on Windows 10 even though it is physically connected?
A microphone can fail on Windows 10 even when plugged in because the problem may exist at several different layers of the system. The issue may be caused by disabled privacy permissions, an incorrect default recording device, a disabled or missing audio driver, or poor microphone calibration. Windows does not treat a microphone as a simple accessory—it routes audio through privacy settings, driver services, and application permissions before software like Zoom or Teams can actually use it.
2. How does the Windows 10 microphone system work from hardware to application?
The microphone pipeline in Windows 10 works in several stages:
- Physical Input Layer: The microphone captures sound waves and converts them into an electrical signal.
- Hardware Layer: An analog-to-digital converter (ADC) transforms the analog signal into digital data.
- Kernel Layer: Windows audio drivers such as Realtek or Intel Smart Sound Technology pass the signal into the operating system using the Windows Driver Model (WDM).
- User Space Layer: Windows Audio and the Core Audio / WASAPI subsystem manage device permissions, routing, and default input assignments.
- Application Layer: Programs like Zoom, Discord, Google Meet, or Microsoft Teams request the microphone stream from Windows and use it for calls or recordings.
If any layer breaks, the microphone may stop working entirely or only fail inside certain apps.
3. What is the first thing to check when a microphone is not detecting sound in Windows 10?
The first thing to check is Windows microphone privacy permissions. Even if the microphone hardware and driver are working properly, Windows can block apps from accessing the microphone if privacy access is turned off.
Go to:
Settings → Privacy → Microphone
Then make sure:
- Allow access to the microphone on this device is turned On
- Allow apps to access your microphone is turned On
If these settings are off, applications will not be able to receive any audio from the microphone.
4. How do I enable microphone permissions in Windows 10?
To enable microphone permissions:
- Press Windows + I to open Settings
- Click Privacy
- Select Microphone from the left sidebar
- Under Allow access to the microphone on this device, click Change and switch it On
- Turn on Allow apps to access your microphone
- If needed, scroll further down and verify that specific desktop apps you use are also allowed to access the microphone
This is one of the most common fixes when the microphone works at the hardware level but apps still cannot hear you.
5. Why does Windows 10 show the microphone, but it still captures no sound?
If Windows detects the microphone but no sound is coming through, the most likely causes are:
- The microphone is disabled in the Sound Control Panel
- The wrong microphone is selected as the default recording device
- The input volume level is too low
- The application is listening to a different microphone
- The device is marked as disconnected or hidden in Windows audio routing
This is usually a routing or configuration problem, not a hardware failure.
6. How do I set the correct microphone as the default recording device in Windows 10?
To set the correct microphone as the default device:
- Press Windows + R
- Type mmsys.cpl and press Enter
- Open the Recording tab
- Right-click inside the list and enable:
- Show Disabled Devices
- Show Disconnected Devices
- Find your microphone
- If it appears grayed out, right-click it and choose Enable
- Select the microphone and click Set Default
- Click Apply and OK
This ensures Windows sends microphone requests to the correct input device by default.
7. What does mmsys.cpl do in Windows 10 microphone troubleshooting?
mmsys.cpl opens the classic Sound Control Panel, which provides deeper access to Windows audio devices than the modern Settings app. It allows you to:
- View all recording devices
- Show hidden or disabled microphones
- Enable a disabled microphone
- Set a microphone as the default device
- Adjust microphone levels and properties
It is one of the most useful tools for fixing microphones that appear connected but do not work properly.
8. My microphone does not appear in the Sound Control Panel at all. What should I do?
If the microphone does not appear in the Sound Control Panel, the problem may be at the driver or hardware level. In that case, open Device Manager:
- Press Windows + X
- Select Device Manager
- Expand Audio inputs and outputs
- Also expand Sound, video and game controllers
- Look for your microphone or audio chipset
- If the device is disabled, right-click it and choose Enable device
- If you see a warning icon, update or reinstall the driver
If the device is missing completely, Windows may not be detecting it due to a driver issue, hardware fault, port issue, or BIOS-level disablement.
9. How do I check microphone drivers in Device Manager on Windows 10?
To verify microphone drivers:
- Right-click the Start button or press Windows + X
- Open Device Manager
- Expand:
- Audio inputs and outputs
- Sound, video and game controllers
- Find your microphone device or audio chipset
- Right-click it and choose:
- Enable device if it is disabled
- Update driver if it shows a problem
- Uninstall device and reboot if you want Windows to reinstall it automatically
Common drivers involved include:
- Realtek High Definition Audio
- Intel Smart Sound Technology
- USB headset drivers
- Webcam microphone drivers
10. What does a yellow warning icon next to an audio device mean in Device Manager?
A yellow warning triangle usually means Windows has detected a problem with the driver or hardware. Common causes include:
- Corrupted or missing audio drivers
- Incompatible driver updates
- Incomplete Windows updates
- USB audio device recognition errors
- Disabled audio services
In this case, you should try Update driver, or download the latest audio driver from your laptop or motherboard manufacturer’s official support page.
11. How do I reinstall a microphone driver in Windows 10?
To reinstall the microphone driver:
- Open Device Manager
- Find the microphone or audio device under Audio inputs and outputs or Sound, video and game controllers
- Right-click it and choose Uninstall device
- Restart your computer
- Windows will attempt to reinstall the driver automatically
If Windows does not install the correct driver, go to the official website of your PC manufacturer (such as Dell, HP, Lenovo, ASUS, Acer, MSI, etc.) and download the latest audio driver for your exact model.
12. Why is the microphone working in Windows settings but not in Zoom, Teams, or Discord?
If the microphone works in Windows but not inside a specific app, the problem is usually one of these:
- The app is set to the wrong input device
- The app does not have microphone permission
- Another program is taking control of the microphone
- The microphone gain is too low for the app to detect clearly
- The app cached an old audio device and needs to be restarted
Check the audio settings inside the application itself and make sure the correct microphone is selected.
13. How do I fix a microphone that works in one app but not another?
Use this process:
- Confirm the microphone works in Windows Sound settings
- Open the problem app’s Audio / Voice settings
- Manually select the correct microphone instead of using “Default”
- Restart the application
- Disconnect and reconnect USB audio devices if applicable
- Make sure no privacy or security software is blocking microphone access
- Test the microphone in another app to isolate whether the issue is app-specific or system-wide
14. What is microphone calibration in Windows 10 and why does it matter?
Microphone calibration helps Windows optimize the input volume and speech pickup level for your microphone. Even if the microphone is enabled and functioning, poor calibration can cause:
- Very quiet voice capture
- Distorted sound
- Muffled audio
- Inconsistent volume during calls
- Speech recognition problems
Windows includes a Speech Recognition microphone setup wizard that helps train the system to better capture your voice.
15. How do I calibrate a microphone in Windows 10?
To calibrate the microphone:
- Open Control Panel
- Go to Ease of Access
- Select Speech Recognition
- Click Set up microphone
- Choose the correct microphone type:
- Headset microphone
- Desktop microphone
- Other / built-in microphone
- Read the sample phrase shown on screen
- Follow the prompts until Windows finishes adjusting the microphone input level
This helps improve voice clarity and gain settings.
16. What if the microphone audio is too quiet or muffled in Windows 10?
If your microphone is too quiet, distorted, or muffled, try these steps:
- Open mmsys.cpl
- Go to the Recording tab
- Double-click your microphone
- Open the Levels tab
- Increase the microphone level
- If available, adjust Microphone Boost carefully
- Re-run the Speech Recognition setup wizard
- Check whether your microphone grille is blocked by dust or debris
- Test the microphone in a quieter room
- For headsets, confirm the microphone boom is positioned correctly near your mouth
17. Can Windows 10 block a microphone without showing an obvious error?
Yes. This is common. Windows privacy settings can silently block microphone access without displaying a dramatic system error. In those cases:
- The microphone may appear installed
- The driver may look normal
- The app may open normally
- But no voice data actually reaches the application
That is why privacy permissions are one of the first things to check.
18. Why does my laptop’s built-in microphone stop working after connecting a USB headset or webcam?
Windows often switches the default input device automatically when a new audio device is connected. For example:
- Plugging in a USB headset may make the headset microphone the default input
- Connecting a webcam may cause Windows or video apps to use the webcam microphone instead of the laptop mic
If your built-in mic suddenly stops working, open mmsys.cpl or the app’s audio settings and confirm which microphone is currently selected.
19. What is the difference between a privacy problem, routing problem, driver problem, and calibration problem?
These four categories affect different parts of the microphone system:
Privacy problem
Windows blocks apps from accessing the microphone even though the device itself works.
Routing problem
The microphone is connected, but Windows is using the wrong input device or the device is disabled in the recording list.
Driver problem
Windows cannot properly detect or communicate with the microphone hardware due to missing, broken, or disabled drivers.
Calibration problem
The microphone works, but audio quality is poor, too quiet, too loud, distorted, or inconsistent.
20. How can I troubleshoot a Windows 10 microphone step by step in the correct order?
Use this order for the fastest diagnosis:
Step 1: Check physical connection
- Replug USB microphones
- Try a different USB port
- Ensure 3.5mm plugs are fully inserted into the correct microphone jack
- For headsets, confirm they are not muted on the cable or earcup
Step 2: Check privacy settings
- Settings → Privacy → Microphone
- Turn on microphone access for the device and apps
Step 3: Check routing and default device
- Open mmsys.cpl
- Show disabled and disconnected devices
- Enable the microphone if needed
- Set it as default
Step 4: Check Device Manager
- Confirm the microphone or audio chipset appears correctly
- Enable, update, or reinstall drivers if necessary
Step 5: Calibrate and test
- Use Speech Recognition → Set up microphone
- Adjust levels in microphone properties
- Test in Voice Recorder or your meeting app
This layered process mirrors how Windows handles audio internally and helps isolate the failure point more efficiently.
21. What are common signs that the microphone issue is hardware-related rather than software-related?
Signs of a hardware issue include:
- The microphone never appears in Device Manager
- It is not detected in the Sound Control Panel
- It fails on multiple computers
- A USB microphone repeatedly disconnects or reconnects
- A headset microphone works only when the cable is bent or held at a certain angle
- The laptop microphone stopped working after physical impact or liquid exposure
In those cases, the problem may be with the microphone itself, the audio jack, USB controller, internal cable, or motherboard audio circuitry.
22. Can Windows 10 microphone issues be caused by outdated manufacturer drivers?
Yes. Windows’ generic drivers may not always handle advanced audio hardware correctly, especially on laptops with custom Realtek, Intel Smart Sound, Nahimic, Waves MaxxAudio, or OEM audio packages. If the microphone behaves erratically, disappears, or sounds poor, installing the latest driver package from the PC manufacturer can often resolve the problem.
23. What should I do if none of the Windows 10 microphone fixes work?
If none of the standard fixes solve the problem, try this escalation path:
- Test the microphone on another computer
- Test a different microphone on the same computer
- Update Windows fully
- Install the latest audio driver from the device manufacturer
- Run Windows Troubleshooter for audio recording
- Check BIOS/UEFI settings if the internal microphone is disabled at firmware level
- Create a new Windows user profile to rule out profile-specific corruption
- Boot into Safe Mode or perform a clean boot to rule out third-party software conflicts
- If it is a laptop internal mic, contact the device manufacturer for hardware diagnostics
24. Which Windows 10 tools are most important for microphone troubleshooting?
The four most important Windows 10 microphone troubleshooting tools are:
- Settings → Privacy → Microphone
For permission and access control - mmsys.cpl (Sound Control Panel)
For device visibility, enable/disable status, and default recording selection - Device Manager
For driver and hardware detection problems - Speech Recognition → Set up microphone
For calibration and voice level tuning
Together, these cover the main microphone failure points from permission layer to signal quality.